

This is a pretty big one for online school. In brick-and-mortar school, you have a pretty rigid schedule. In online school, there’s a lot more flexibility. Because of the flexibility, it’s important to make a schedule so you can keep track of your classes and stay on track with your assignments.
The easiest way to create a schedule is by using an online calendar like Google Calendar. You can use Google Calendar, or another similar application, to give you notifications on your computer when your next class/assignment is. Another easy way is by writing out a schedule on a piece of paper–either a printed out schedule or not. The only issue is that you can’t get automatic reminders from a piece of paper.
That’s basically the rough idea of how to create a schedule for online school. Let’s go a bit more in-depth, shall we?
What Should I Put on an Online School Schedule?
A lot of what you should put in your schedule is mainly up to you. Some people like to have their schedules packed full of absolutely everything they need to do and exactly when they are going to do it. Other people prefer the bare minimums.
A lot of it is up to you. However, there are a few thing I would recommend putting on your schedule:
- Class times. If you have online classes, this one is practically a must. If you have more than one online class, it can be super easy to forget when they are and which ones are when. Having it in your schedule makes it way easier. That way, you don’t have to remember it. Instead, your schedule does.
- Due Dates. It can be helpful to have the due dates of assignments put up in your calendar. Especially if one of those assignments has a due date that doesn’t follow along with the standard due date of most other assignments.
- Holidays and Special Dates. Most of the time, holidays mean days off of school. So do special school occasions–parent-teacher conferences, teacher meetings, etc.
Usually calendars keep the standard holidays in the calendar for you. If your school doesn’t have school on those days, it can be a helpful reminder by having it in your calendar. It may sound dumb now, but it’s a lot easier to forget about holidays when you’re doing virtual school because you’re (usually) in the same environment the whole time, regardless of whether you’re doing school or not. When that happens, it can be easy to forget when holidays are. Putting in the special school dates are helpful for the same reasons.
Those are really all I would recommend putting in your calendar/schedule. Anything else is purely up to you.
If you’d like to put time blocks in there for certain activities (for instance, you could put a time block in your calendar of when you’re going to be working on X assignment), then do it. There are examples of how to set up a calendar, as well as example calendars later in this blog post.
What Should I Use to Create My Schedule?
There’s a lot of different scheduling and calendar apps, software, and tools out there. With so many choices, which one should you use? I’ve picked out some of my favorites here. You should be able to find something that will work on whatever device you happen to be using.
Google Calendar
If you use a lot of Google’s products, Google Calendar is a great option. It’s free, it’s easy to use, and you can use it across multiple devices.
There’s a browser version for PC and an app version for mobile. You can sync your calendars across your different devices so you don’t lose track of your schedule.
That’s really all there is to say about Google Calendar.
Outlook
If you prefer Microsoft’s products to Google’s, then Outlook (previously Hotmail) is another good option. It has a browser version, a mobile app, and a PC app (though the PC app comes with the Microsoft 365–previously Office 365–subscription).
You can sync your calendars across devices. Plus, if you have the Microsoft 365 subscription, you can use the Outlook app as a hub to sync all of your emails across. Then, all your emails can be found in one place.
How to Create an Online School Schedule
Now we’re getting to the good stuff. How to actually create a schedule. We have more in-depth guides on how to use the calendar/scheduling apps we recommend, but I’ll go ahead and give you a rough overview here.
Generally, the only things you have to worry about putting on your schedule are your classes. Putting due dates can certainly be helpful, but a lot of times the due dates aren’t very predictable–they can vary from assignment to assignment. That usually results in it being more effort than it’s worth to create due dates for each assignment in your schedule.
Instead, it’s easier to just create a to-do list of all of your assignments, as well as their due dates, and use that instead. This way, you won’t have a super cluttered schedule and can more easily keep track of your assignments.
When it comes to creating your schedule, the process can be different for each tool, but I’ll use Google Calendar to demonstrate. We’ll stick with the bare essentials here.
Here’s how to create an event in Google Calendar:
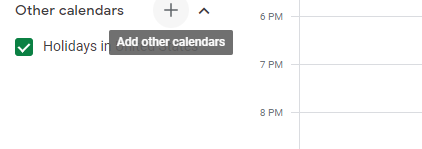
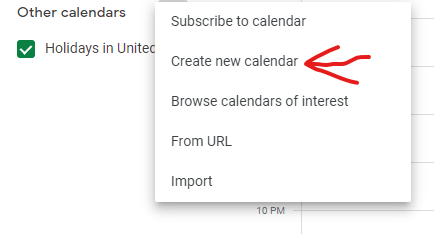
1. Create a schedule by clicking the plus sign near the bottom near “Other calendars” and clicking “Create new calendar.”
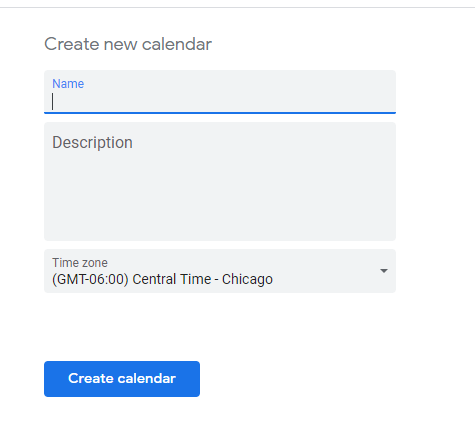
2. Give your calendar a name and make sure the time zone is correct, then click “Create calendar.”
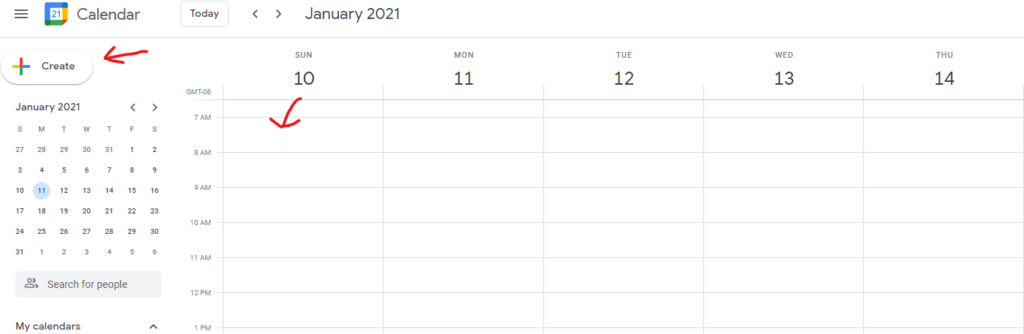
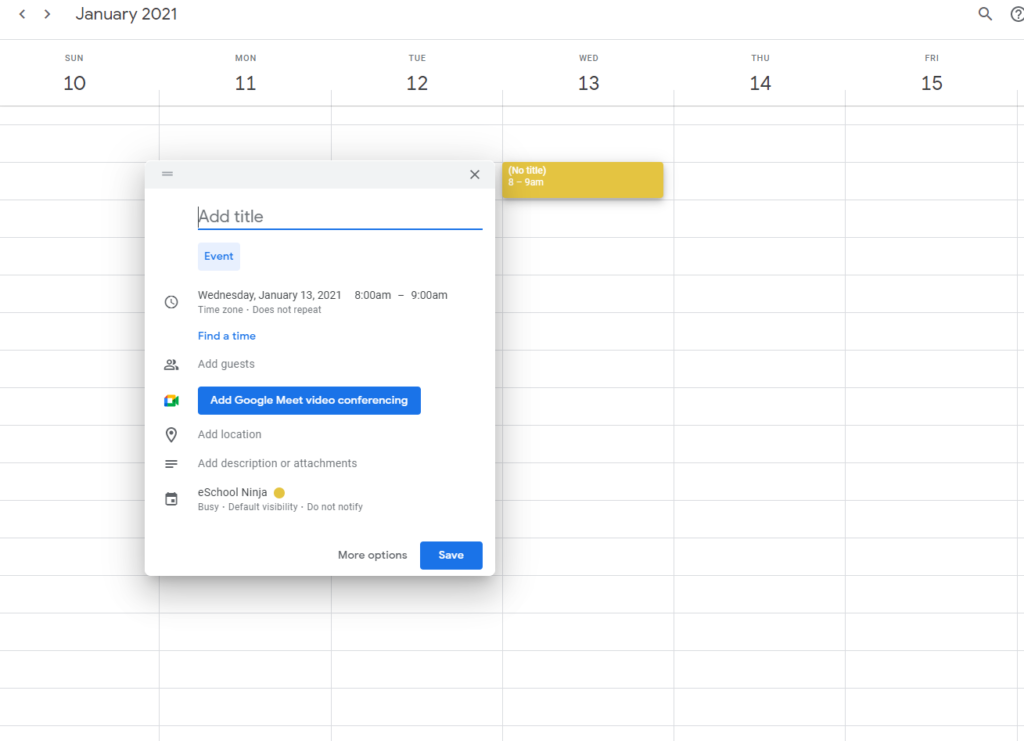
3. Now, we go on to creating the events. Click “Create” or click a time slot in the calendar itself.
4. After you do that, something like this will pop up. You can go ahead and enter the title of it here, but we’ll want to click the “More options” button at the bottom for more customization.
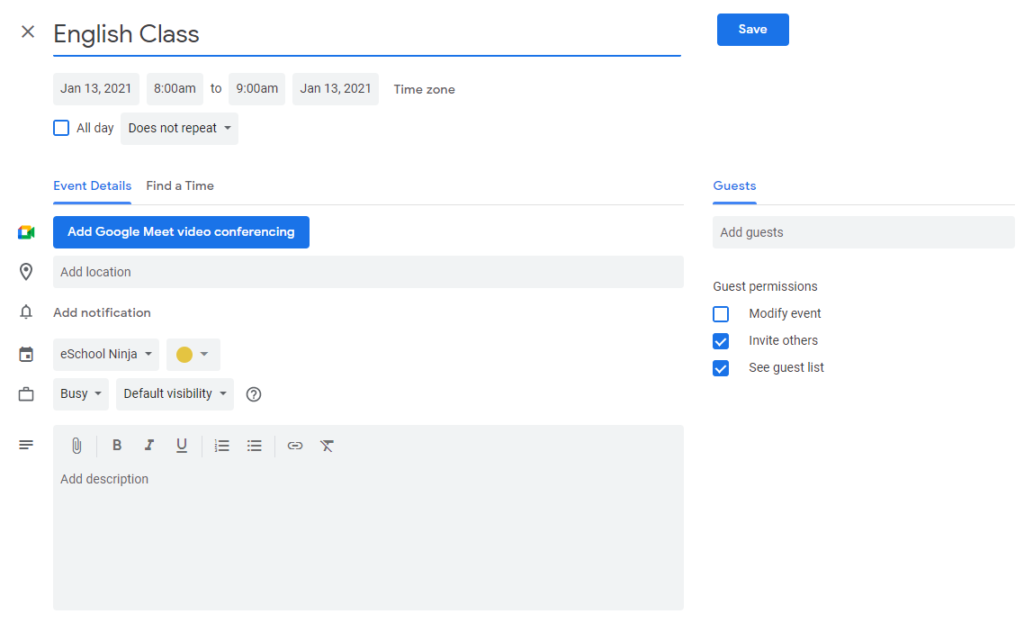
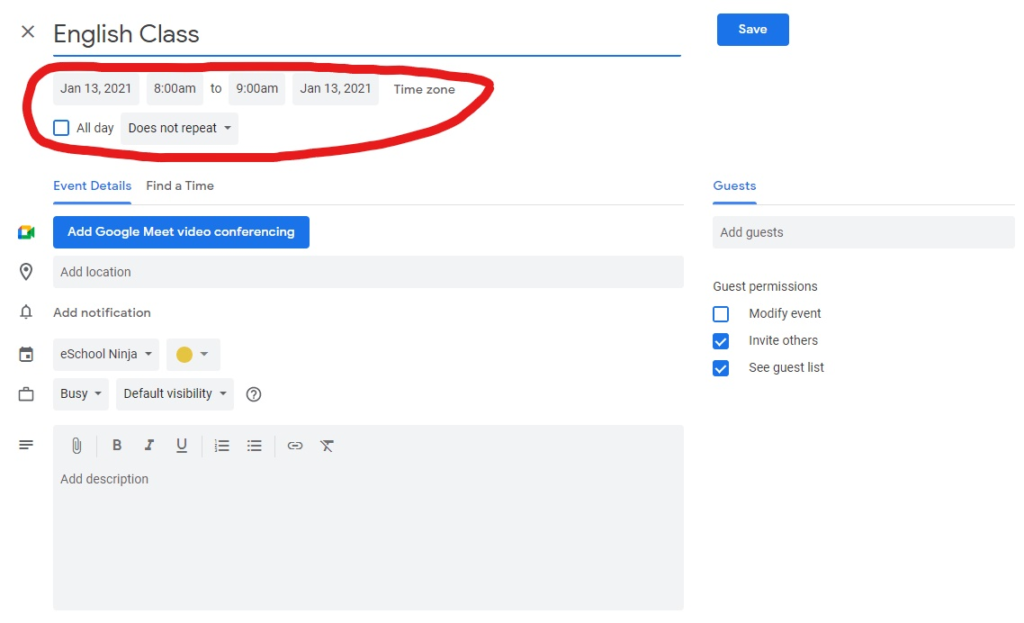
5. After you click “More options,” you’ll go to this page.
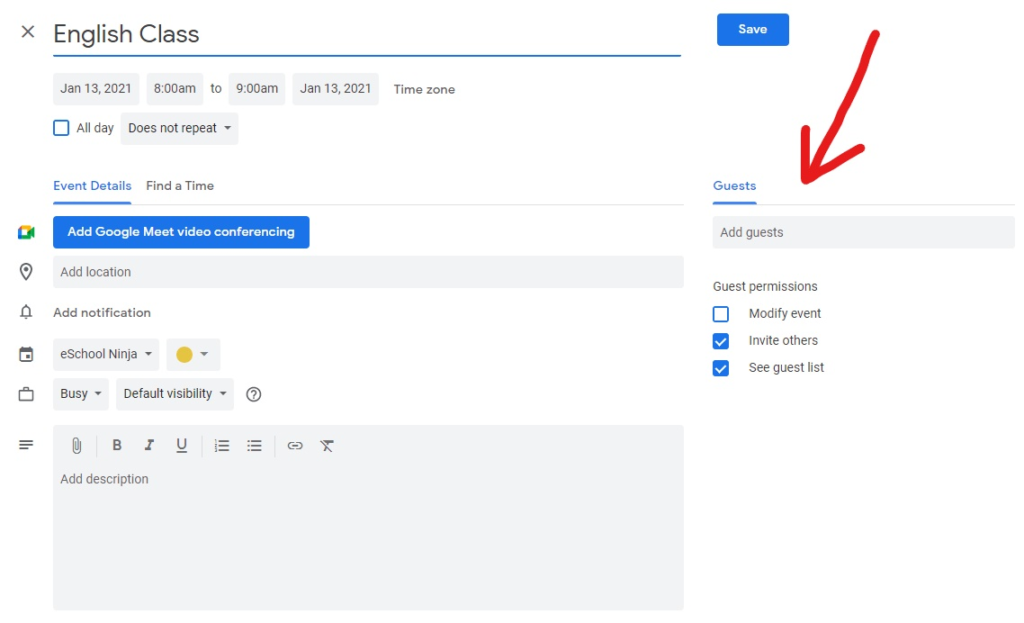
5a. Here, you can invite others with the “Add guests” part. If you have someone you’d like to share your event with, then do it here.
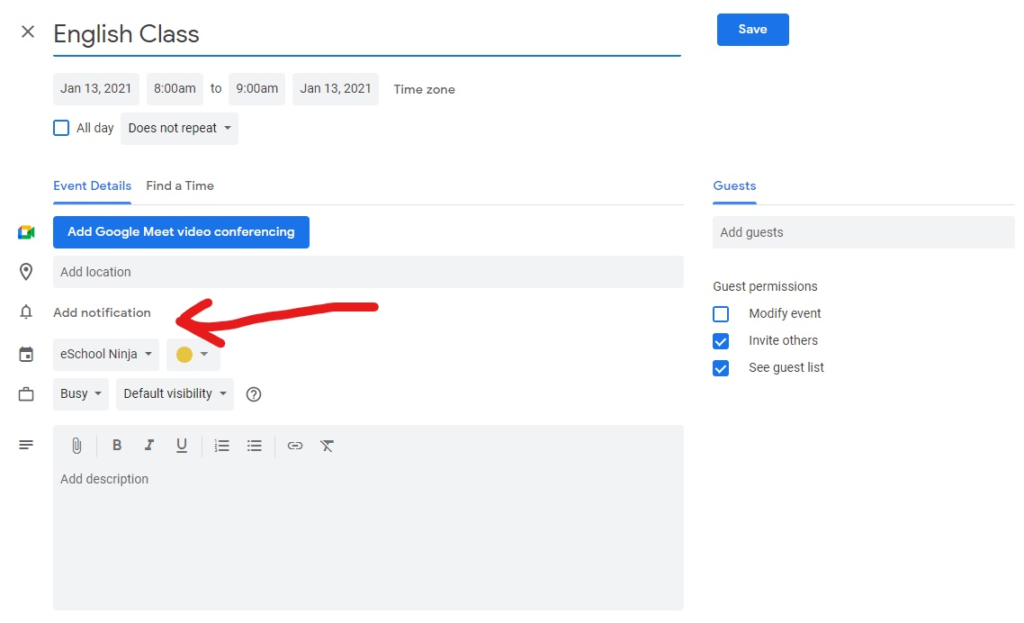
5b. You can add a notification here. This sends you a notification or email to make you aware of your event. You can add multiple notifications if you want.
5c. And you can repeat the event/change its time here. If you need to make your event repeat, or if you need to make the time it takes place more precise, you can do it here.
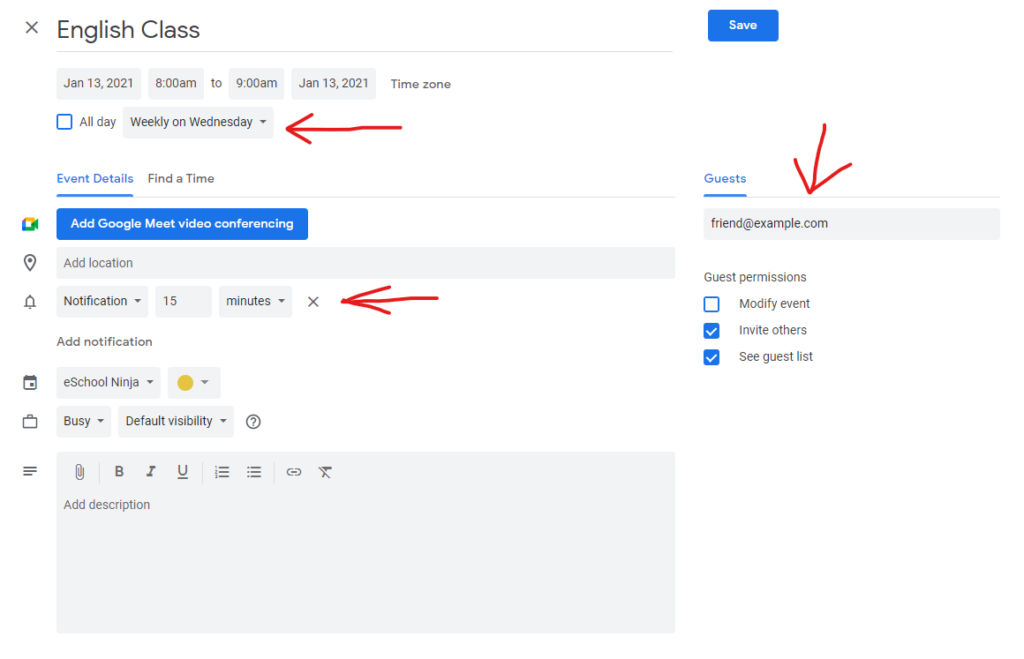
6. Taking all of those components of adding an event, just change them to match your needs and you’ll be good to go.
As an example, I changed my event (in this case, English class) to repeat every Wednesday from 8:00am to 9:00am, I added a notification 15 minutes before it takes place to give me ample time to get ready, and I sent the notification to my friend, who has the same English class.
If you feel like going with the bare minimums when it comes to populating your schedule, then just put your classes down like this:
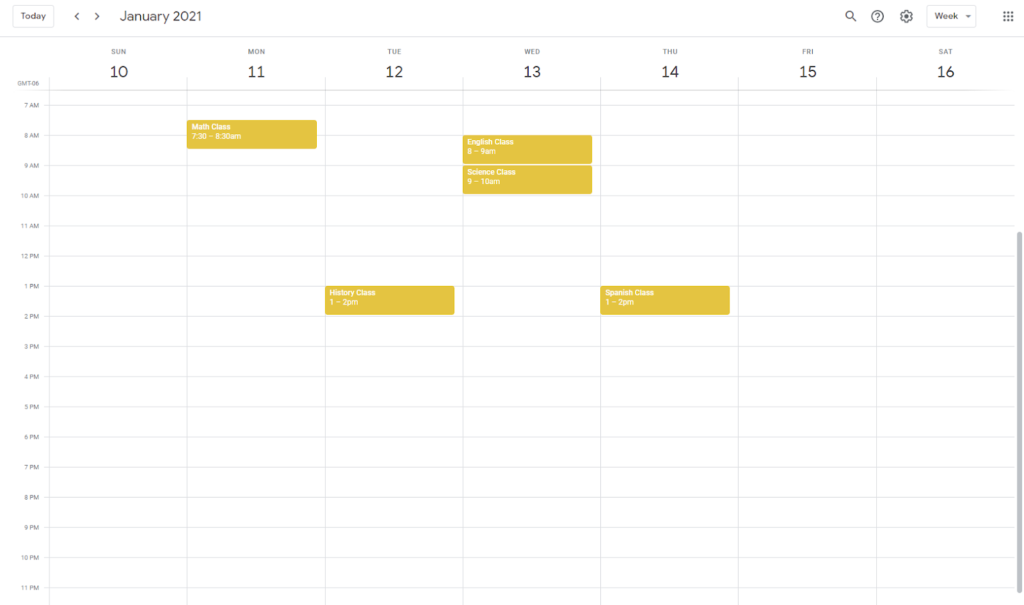
In that schedule, I put all the classes I have.
If you’d like to go more exhaustive in your schedule and put due dates, you can do something like this:
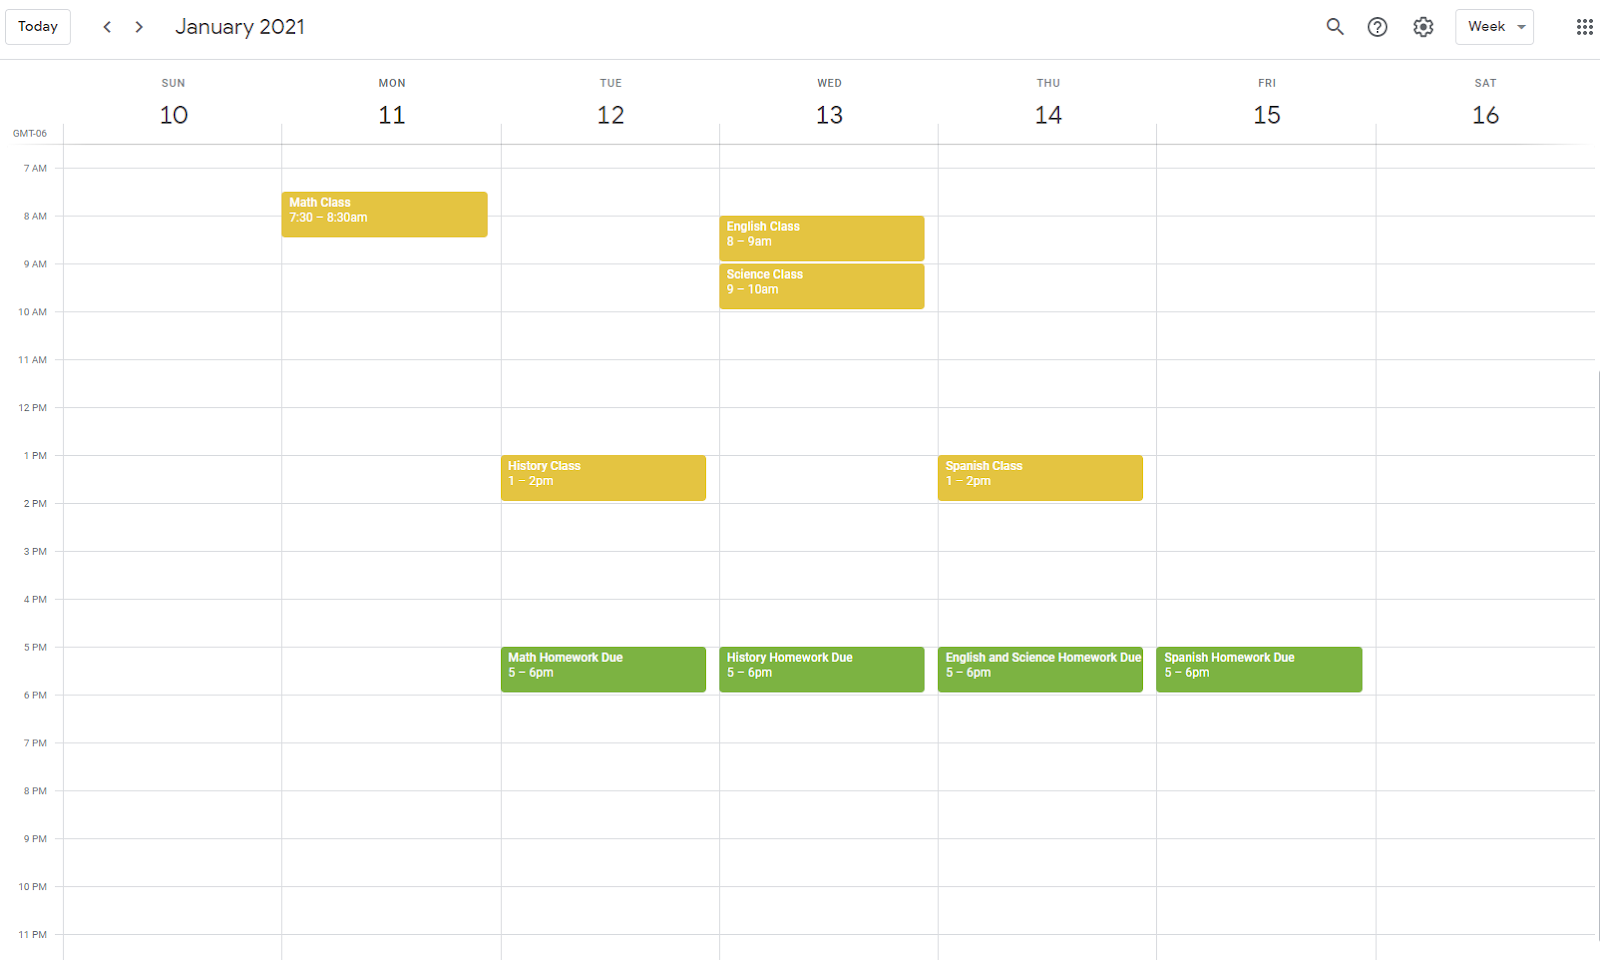
Creating different schedules and putting your different types of events color coded can help differentiate them and make them easier to distinguish. In this case, I have yellow for my classes and green for my due dates.
If you’d like to go completely exhaustive and account for all of your activities–classes, working on assignments, lunch, due dates, etc.–and completely fill up your calendar, you can do something like this:

Obviously, your calendar will be different: You might not have the same classes, you might not take as long (or as short) to work on each subject, and you may even incorporate breaks into your schedule. It’s going to vary. That just serves as an example of how filled up you can make your schedule if you so choose.
Personally, I like going with the minimalist style and only filling it up with my classes. My assignments and the due dates for them go on a separate to-do list. But you can do whatever floats your boat.
There you go! There’s how to create a schedule for online school.
If you’re more old school and would like to create your schedule (and to-do list) on paper, we’ve got some you can print out. If you’d like those, then sign up using the form below and we’ll send them to you.


